About BlueJ
Scope and audience
Copyright, licensing and redistribution
Feedback
If you do not have JDK installed, you can download it from Sun's website at http://java.sun.com/j2se. Java Runtime Environment) and “SDK” (Software Development Kit), you need to download “SDK” – the JRE is not sufficient. You can get this file on disk, or you can download it from the BlueJ website at http://www.bluej.org.
If you have several versions of BlueJ installed, you can use one version of BlueJ with JDK 1.4.2 and another BlueJ version with JDK 1.5.
Installation on Macintosh
Installation on Linux/Unix and other systems
Installation problems
Opening a project
Creating objects
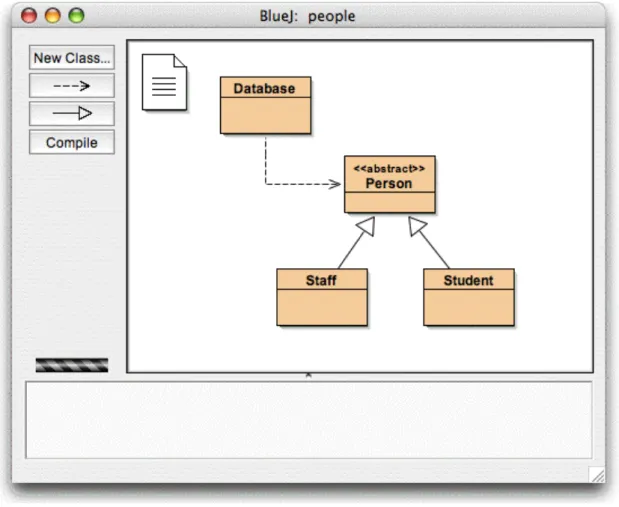
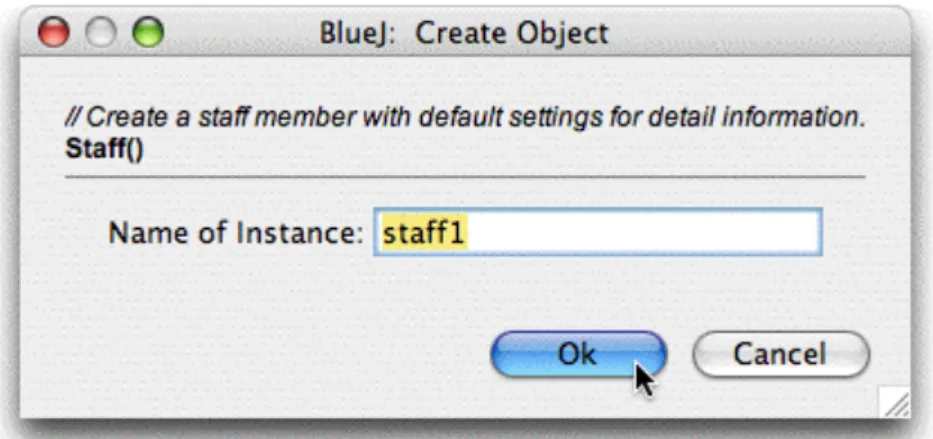
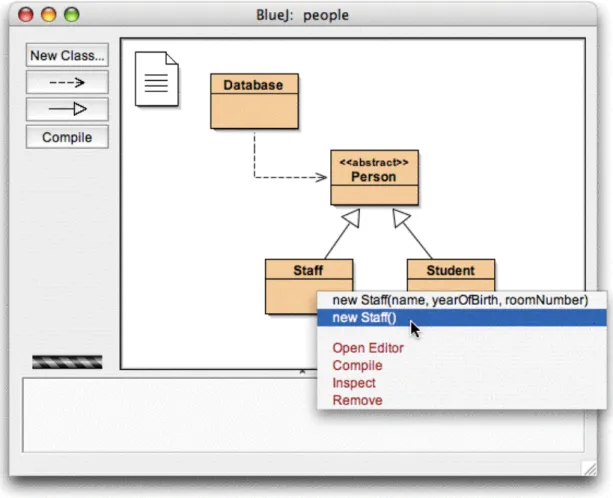
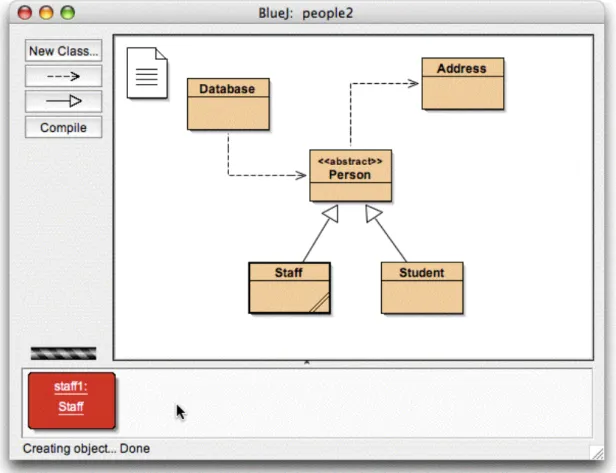
We want to create a Staff object, so you need to right-click the Staff icon (which brings up the menu in Figure 2). The menu shows two constructors to create a Staff object, one with parameters and one without. That's all there is to object creation: select a constructor from the class menu, run it, and you have the object on the object bank.
You may have noticed that the class Person is marked <
Execution
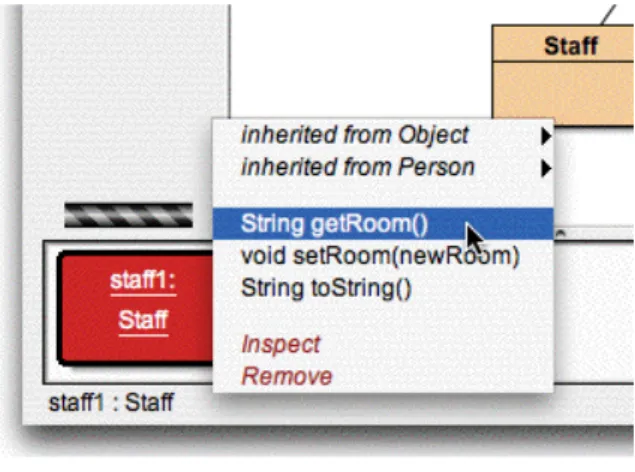
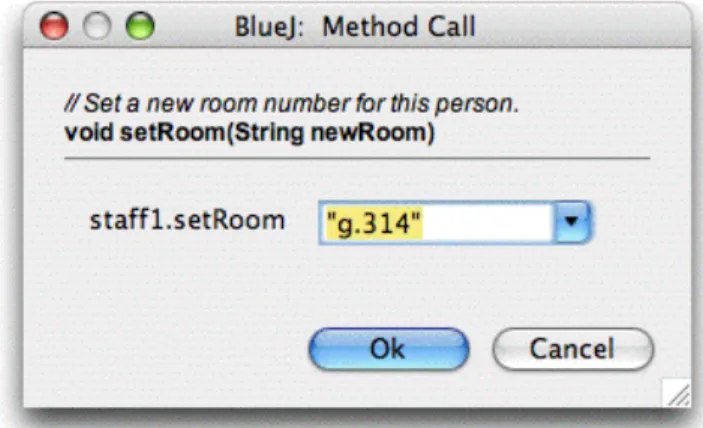
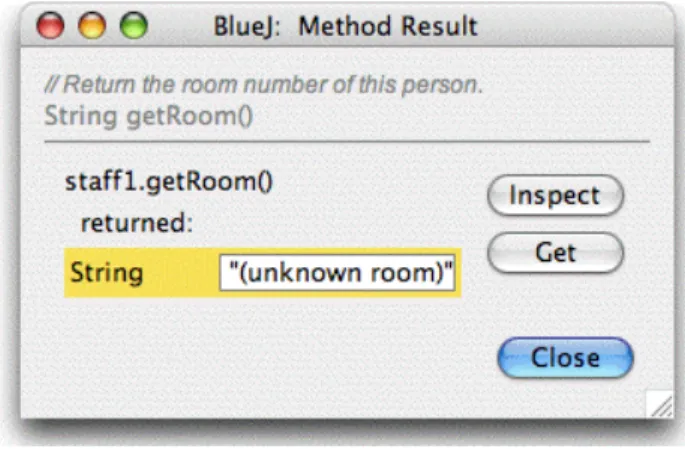
At the top of the object's pop-up menu are two submenus, one for the methods inherited from Object and one for those from Person (Figure 5). You'll notice that the answer is equally vague: it answers "(unknown name)", because we didn't name our person. At the top, this dialog shows the interface of the method to be called (including comment and signature).
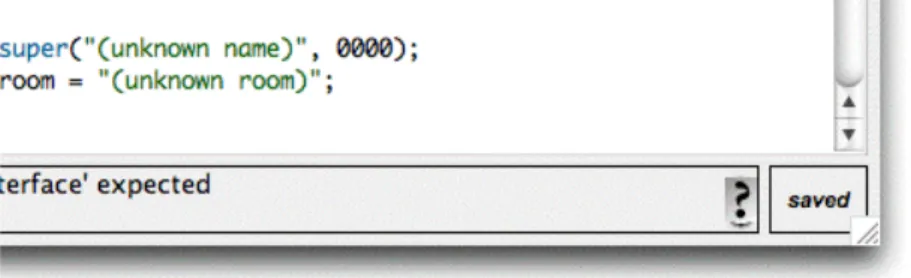
The signature at the top tells us that a parameter of type String is expected.
Editing a class
Compilation
Try calling a constructor with arguments and call some more methods until you are familiar with these operations. appear in the information area at the bottom of the editor to notify you that the class has been assembled. If you have made a mistake that results in a syntax error, the line of the error is highlighted and an error message is displayed in the information area. Resources are automatically saved when needed (for example, when the editor is closed or before a class is compiled).
You can explicitly save if you want (there's a function in the editor's Class menu), but it's really only necessary if your system is really unstable and crashes frequently, and you're worried about losing your work. In fact, it determines which classes need to be recompiled and then recompiles those classes in the correct order.). Try this by changing two or more classes (so that two or more classes appear striped in the class diagram) and then click the Compile button.
If an error is detected in one of the compiled classes, the editor will be opened and the error location and message displayed.
Help with compiler errors
In this section we will go over some more things you can do in the environment.
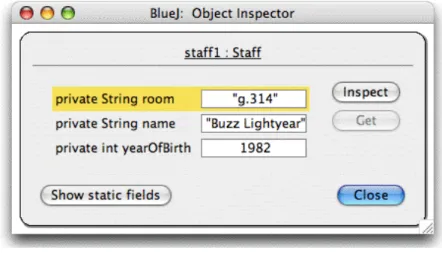
Inspection
For the next thing we want to test—scanning with object fields—create a Staff object and then call that object's setAddress method (you'll find it in the Person submenu). Internally, the Staff code creates an Address class object and stores it in its address field. As you can see, its value is displayed as an arrow indicating a reference to another object.
Since this is a complex user-defined object, its value cannot be displayed directly in this list. To further review the address, select the address field in the list and click the Review button in the dialog box. In turn, another transparent window opens, showing the details of the address object (Figure 12).
If the selected field is public, then instead of clicking View, you can also select the address field and click the Get button.
Passing objects as parameters
There you can investigate it further by making calls to its methods. has only one constructor that takes no parameters, so constructing an object is straight forward.). If you don't already have a Staff or Student object on the object bank, create one of those as well. For the following you need a Database object and a Staff or Student object on the object bank at the same time.
Remember: the class Person is abstract, so there are no objects directly of type Person. To pass the object you have on your object bank as a parameter to the call you make, you can enter its name in the parameter field or, as a shortcut, just click on the object. You can call the listAll method on the Database object to make sure that the operation is actually performed.
A file selection dialog will open, letting you specify a name and location for the new project. After you click OK, a folder is created with the name you specified, and the main window displays the new, empty project.
Creating classes
Creating dependencies
Removing elements
The BlueJ code tool allows quick and easy evaluation of arbitrary pieces of Java code (expressions and statements). Thus, the code pad can be used to investigate details of Java semantics and to illustrate and experiment with Java syntax.
Showing the code pad
Simple expression evaluation
Receiving objects
This will place the object on the bench, where it will be available for further calls to its methods, either via its popup menu or via the code keyboard.
Inspecting objects
Executing statements
Multi-line statements and sequences of statements
Working with variables
Command history
In conversation with computer science teachers, we very often heard the comment that the use of a debugger in the first year of teaching would be good, but there is simply no time to introduce it. Students struggle with editor, compiler and implementation; there is no more time to introduce another complicated tool. The goal is to have a debugger that you can explain in 15 minutes and that students can use from then on without further instruction.
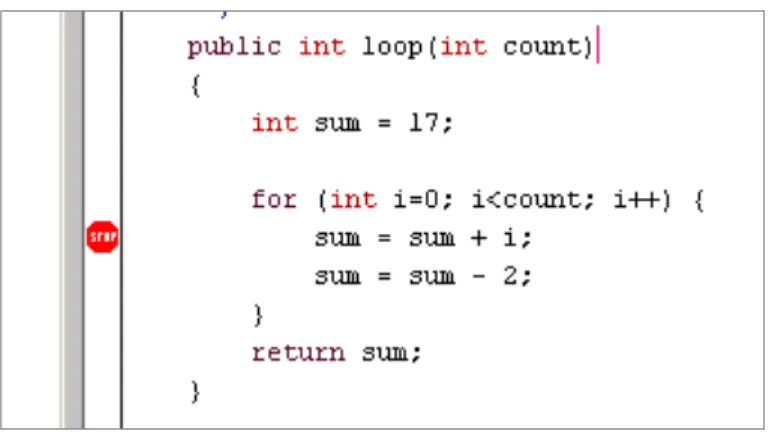
To get started, open the project debug demo, which is included in the examples library in the distribution. This project contains a few classes for the sole purpose of demonstrating the debugger functionality - otherwise they don't make much sense. Summary: To set a breakpoint, click in the breakpoint area to the left of the text in the editor.
Open the class demo, find the method loop and set a breakpoint somewhere in the for loop. When the line of code that attached the breakpoint is reached, execution will be interrupted. Once the breakpoint is reached, the editor window appears, showing the current line of code, and a debugger window appears.
Stepping through the code
Inspecting variables
You can select Demo.carTest in this list to inspect the source and the current variable values in this method. If you step past the line containing the new Car(..) instruction, you can see that the value of the local variable myCar is shown as
Halt and terminate
Executable jar files can be run on some systems by double-clicking the file (for example on Windows and MacOS X), or by issuing the command java -jar
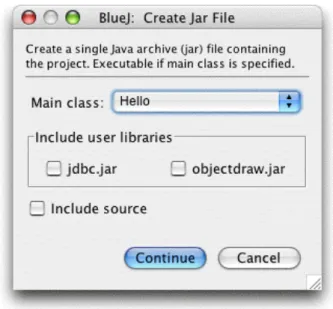
If you have configured BlueJ to use user libraries (either through the Preferences/Libraries setting or by using the lib/userlib directory), you will see an area titled Include User Libraries in the center of the dialog box. If you don't use libraries, this area is absent.) Check every library your current project uses. You will then see a file picker dialog where you can specify a name for the jar file to be created. If you don't have any libraries to include, a hello.jar file will now be created.
If you have libraries, a folder named hello will be created and in it the jar file hello.jar. Your jar expects to find referenced libraries in the same directory as itself - so be sure to keep these jars together when moving them around. Then go to the folder where you saved your jar file (you should see a hello.jar file).
The class icon is marked (with the <
Creating an applet
Your web browser may be running a different version of Java and, depending on which version of the browser you use, may cause problems.
Testing the applet
Select the folder containing the Java source files and then click the Open in BlueJ button.
Adding existing classes to your project
Calling main and other static methods
Right-click the class, and you'll see that the class menu includes not only the class's constructor, but also the static main method. Side note: In standard Java, array constants cannot be used as actual arguments to method calls. In BlueJ, to enable interactive calls of standard main methods, we allow array constants to be passed as parameters.
Generating documentation
Working with libraries
Creating objects from library classes
To get help with a compilation error message, click the question mark next to the error message. An object can be passed as a parameter to a method call by clicking the object icon. To create an arrow, click the arrow button and drag the arrow in the diagram, or just type the source code in the editor.
To transfer objects from the code block to the object panel, drag the small object icon. To set a breakpoint, click in the breakpoint area to the left of the text in the editor. To single-step through your code, use the Step and Step Into buttons in the debugger.