However, sometimes it is difficult for a game developer to know which field of game development is the most tempting. This is the main purpose of this thesis, to help the reader with a brief overview of most areas of game development.
Creating a new scene
Setting up High Definition Render Pipeline and Post Processing
Terrain
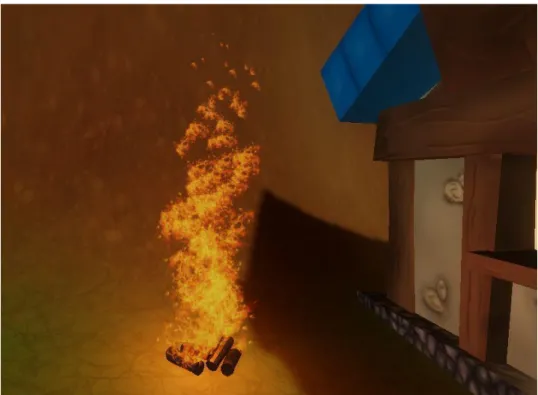
Creating Fire
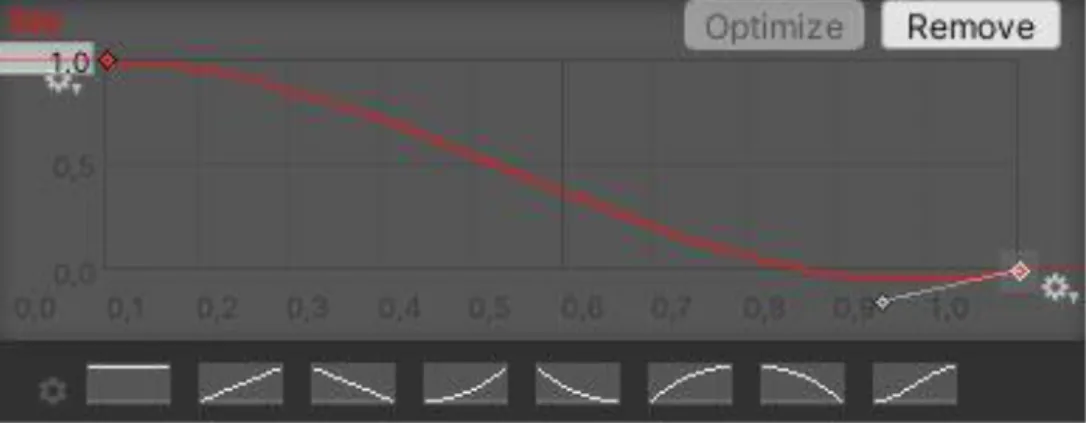
This is one option you can use to adjust how long the flame grows. Size over Lifetime allows the user to assign a particle size progression over the lifetime of the particle. The right indicator (which indicates the end of life) should be dragged to the lower right corner of the chart.
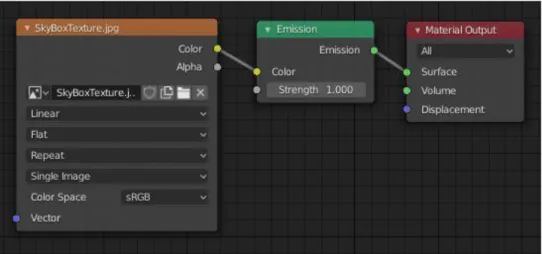
Then under the Emission tab, it's important to change the light color to warm orange to match the fire. Adding code to an object is done by clicking on the object (point light) and scrolling down to the bottom in the Object Inspector. The first two float values in Figure 2 are needed to determine the maximum and minimum light intensity.
Sculpting
Preparing a sculpt
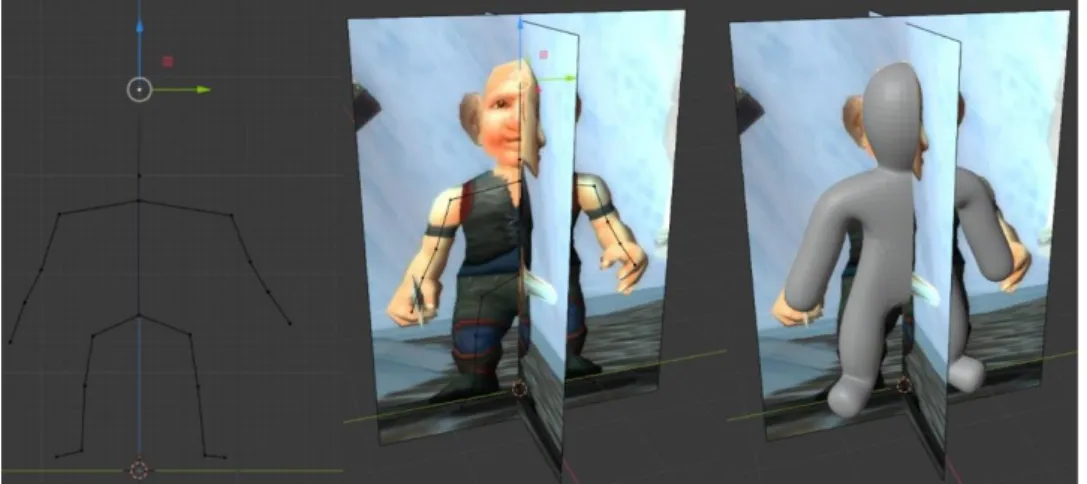
Once the base shape of the character is ready, some volume can be added back from Modifier Properties. Now the thickness of the mesh can be scaled by selecting a vertex in Layout tab's Edit Mode and then pressing key combination Ctrl and A. The Viewport Shadings can be accessed by pressing Z key or from the top right corner of the screen.
Finally, if both sides of the mesh need to be identical, a new handy tool called Auto Mirror can be used for that. Auto Mirror can be activated from the Add-ons tab in Preferences, which is located in the Edit tab in the top left corner of the screen. Once activated, the Auto Mirror tool can be found in the Edit tab of the sidebar.
Tools
When the scaling is done, the modifiers can be applied by pressing Apply to each modifier while in Object Mode. When mirroring the mesh, the mesh must be selected and the settings must be set depending on which side of the mesh is to be copied and on which axes. After these steps, the model should look like the one on the right.
Crease This brush creates a crease, which is great for finalizing the model. Outside of brushes, Dyantopo is one of the most important sculpting tools in Blender. Relative detail is a great setting if the model needs more detail on some parts, like the face, and less on others, like a leg.
Starting the Sculpting
In the Detailing setting, the most popular options are Relative Detail, which changes the detail size based on the brush size. With Constant Detail, the user always knows exactly how much detail is being added to the surface. The best way to start sculpting is probably to drag parts of the mesh into place with the grab tool.
Especially at the beginning of sculpting, it's good to use a reference image as a background to get the basic shapes of your character. Once basic shapes have been dragged into place, it's good to start using other tools. After inflating the muscles, the folding tool is ideal for sketching the muscles and other shapes in the body.
Fangs and Hair
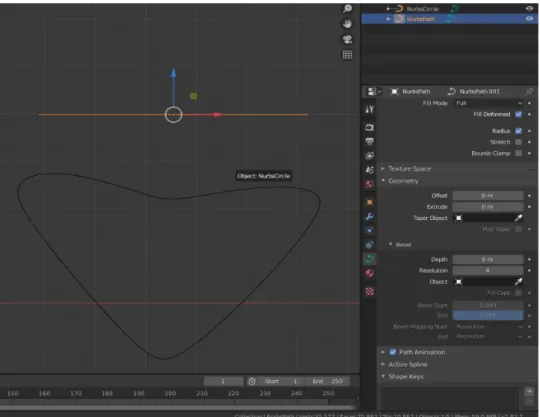
It can be created by pressing the key combination Shit + A and selecting the desired curves under the Curve option. The shape can be changed by selecting the Circle Curve and going to Edit Mode. In edit mode, the vertices of the curve can be moved or more vertices can be added by selecting multiple vertices, right-clicking on them, and then clicking Subdivide.
Then it is good to close the ends of the hair to get a more natural look. In edit mode, select each end of the curve and shrink them with Alt + S. Also, all vertices on the curve can be enlarged or moved, and more vertices can be added by splitting.
Rigging and Animating
Rigging
When you e.g. making a fang, the other end of the curve may be better left open. Once the bone structure is ready, it's time to assign the structure to the character by selecting the entire character and bone structure and right-clicking to open the object context menu. This can be tested by selecting the bone structure and then going to Pose Mode from the top left corner of the screen.
Weight Painting can be done in the Weight Pain mode when the first mesh is selected. Once in Weight Paint mode, in the Object Data Properties tab of the Properties window the bones can be found. If the weights are not smoothly extinguished, the movement of the mesh will not be smooth and realistic either.
Animation
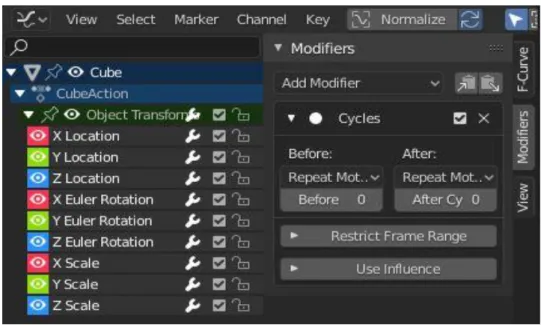
The Animation tab allows Auto Keying to be enabled in the timeline window. When going through an animation, the end of the animation should simply be trimmed to the final pose of the animation. For example, if you are creating a running animation, the first and last pose must be the same, and the end of the animation must be trimmed to one frame before the last pose.
So if the last pose is at frame 30, the animation must be clipped to frame 29. This way the animation doesn't play the same pose for two frames in a row (the very first and the very last). When the animation is ready to be looped, a Graph Editor window should open.
Krita
This segment is going to explain in detail how to make a skybox for a game scene. First a program to paint the texture, then a program to make the texture sit nicely on a spherical shape like the skybox is.
Painting the texture in Krita
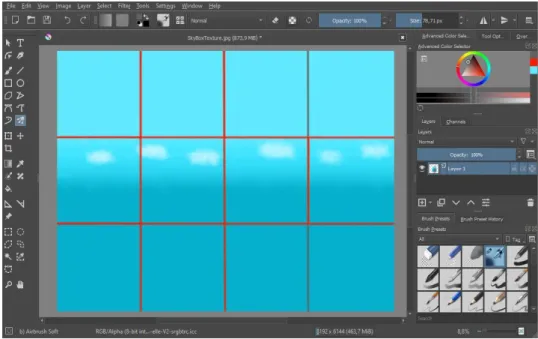
Once the image is created, all background layers can be removed, as only one layer is needed to create this texture. It is also good to keep in mind that when the image is used in Unity it will be split into 12 parts (4x3) and only 6 will be used. In Figure 10, the 4 squares in the middle row are the sides of the skybox, the second from the left on the top row is the top of the sky, and the second from the left on the bottom row is the bottom of the skybox.
It is still good to paint a little over the lines or even the whole picture to avoid any seams when the picture is stretched.(Andrews, 2017). The simplest and easiest way is just to make an ombre of blue colors progressing from dark blue to lighter. It's good to tap some of the blue colors in between with a brush to break up the continuity.
Matching the texture to a sphere in Blender
The texture and unwrapped cube can be viewed in the UV Editor window that should open by default on the right side of the screen when you access the UV Editing tab. This can be done by simply manually selecting and then rotating and moving the wrapper in the UV Editor window. It's good to remember that if you want something in Blender to scale one axis at a time, this can be done by first selecting the object, then pressing the S key for the scale tool, and then pressing X, Z, or Y. depending on axis that wanted to be scaled.
To check if the normals are facing inward, the Display Normals option must be enabled from the Viewport Overlays menu in the upper right corner of the screen. This can be done by opening the Texture Paint tab and scrolling the view to inside the object. Once the texture is ready, it can be saved normally and taken to Unity for use.
Adding a skybox in Unity
Now for the final step, add a modifier to the cube in the Modifier Properties tab called Subdivision Surface. At this point it's good to add the most important override, HDRI Sky. The texture can be added simply by dragging and dropping it to the HDRI Sky slot.
The rotation and lighting of the skybox can also be adjusted from this Override, but these are better solved quickly when the skybox is visible. Now the volume should finally use the HDRI Sky with the sky texture as the sky box (Singh, 2018). Fog can also be used to blur the sharp edges of the terrain if needed.
Characters
The head ended up with a lot more detail and for that reason doesn't really match the rest of the body as well as it could. The sheep only had the wool structure painted on them, so no special methods were used for that. However, the wool part of the sheep could look better if it wasn't so smooth.
The great thing about rigging in Blender is that there are ready bone structures for a human and a few different kinds of animals. For the goblin, the bone structure was created manually by simply extruding bone by bone. The finished bone structures in Blender are quite complicated and have many bones, so for this simple sheep, all the excess bones were deleted to simplify the structure.

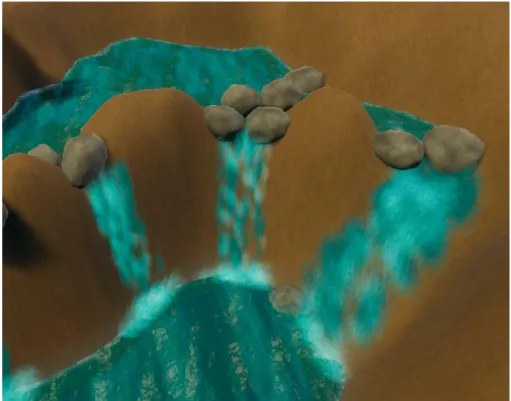
Fires and Waterfalls
Blender has a few ways to make a surface robust that can be used for this purpose. Just using a different texture for the particles and tweaking some settings such as the direction the particles move made all the difference. The part where the water falls has a darker layer of blue particles, but also an almost white layer representing foam forming from the water.
In addition, there is another almost white particle system at the very bottom, which more smoothly blends the waterfall with water with a few more particles of foam or mist. It just spins the particles around and moves them slightly outward from the center of the particle system.
Terrain and Skybox
The goal of the thesis was to create a simple Unity 3D game scene with some effects and features, but no gameplay. The main purpose was to show the reader how the different fields of game development work, to help the reader identify the field that is closest to them. Overall, the thesis turned out great, although many functionalities did not quite make it to the final scene.
At the end of the day, there are an infinite number of fascinating features, so even if the author had twice the time to work on the thesis, there would still be plenty more left to show. But hopefully it gave the reader an idea of what game development can be like and most of all encouraged the reader to find out more and progress in the art of game development. Available at: https://all3dp.com/2/blender-background-image-simply-explained/. 2006) Apple Design Award Winners Announced, Ars Technica.