Standard versions of the PHD6 must be charged with the UL/CSA approved charger which is Sperian part number. European versions of the PHD6 must be charged with the ATEX approved charger which is Sperian part number. The PHD6 monitors the status of the PID lamp to ensure it is working properly.

Event logger
To retrieve the information from the black box data recorder, the PHD6 must be returned to Sperian. The "black box" data recorder in the PHD6 can be upgraded at any time to a fully featured data logger.
PHD6 design components
The "black box" is in continuous operation, whether the user is aware of it or not. The black box data recorder stores a minimum of 63 hours of data in one-minute increments before writing new data over the oldest data.
Case: The instrument is enclosed in a solid PC (polycarbonate) case with TPE (rubber)
The black box stores important information such as gas readings, on times, off times, temperatures, battery conditions, most recent calibration date and settings, types of sensors currently installed, sensor serial numbers, warranty expiration and service due dates, and current alarm settings. Once the memory is "full", the PHD6 will start writing the new data over the oldest data.
Front face: The front face of the instrument houses the MODE button, navigation keys,
There is no charge for the transfer service, but the user is responsible for all transportation costs incurred. All that is required is the activation code corresponding to the PHD6 serial number and the PHD6 Upgrade Utility Program.
Display: A liquid crystal display (LCD) shows readings, messages, and other
Alarm LEDs: Top, front and side-mounted LED (light emitting diode) alarm lights provide
Infrared Port: The infrared port is located at the bottom of the instrument and is used for
Navigation Keys: The up and down navigation keys are located between the
Sensor compartment cover: The sensors are located in a vented compartment at the
Audible alarm ports: Two cylindrical ports extending through the front of the instrument
Battery pack: Two types of interchangeable battery packs (rechargeable Lithium Ion (Li-
Battery charger connector: A water- resistant connector at the bottom of the case
PHD6 standard accessories
- Alkaline PHD6 detectors
- Li-Ion PHD6 detectors
If the PHD6 was purchased as an alkaline instrument, standard accessories include an alkaline battery pack and a set of 3 disposable AA alkaline batteries. If the PHD6 was purchased as a rechargeable Li-ion instrument, standard accessories include a Li-ion battery and PHD6 plug-in charger.
PHD6 kits
- PHD6 Confined Space Kits
- PHD6 Value Packs
Basic Operations
- Turning the PHD6 On
- Start up with pump
- Start up with PID or IR sensor When a PID or IR sensor is
- Operating Logic
- Status Bar
- Screen Flip
- Turning the PHD6 Off
- Atmospheric Hazard Alarms
- O2 Alarms
- Combustible Gas Alarms
- Toxic and VOC sensor alarms The PHD6 is equipped with up to four different
- Alarm Descriptions Warning Alarms
- Other Alarms
- Missing Sensor Alarms
- Sensor Overrange alarm The PHD6 will show a vertical
- PID Lamp Out Alarm The PID sensor in the PHD6
- O 2 Too Low for LEL Alarms
- Low Battery Alarms
- Calibration Due Warning
- Out of Temperature Range If the operating temperature
- PC Connection via Infrared Port
- PID sensor reactivity ratios
- Displayed VOC To change the displayed
- Special Instructions for NDIR sensors
- Special Calibration Requirement for NDIR CO 2 (Carbon Dioxide) Sensor
- Special Consideration for IR CH 4
- Hydrogen Warning for IR CH 4 Methane Sensor
When the MODE button is pressed, the PHD6 will proceed to the current gas reading screen. Once the PHD6 has completed the power-up sequence, the current gas reading screen will be displayed. To turn off the PHD6, press and hold the MODE button until the display shows.
The PHD6 also regularly tests the lamp in the PID sensor during normal operation. Removing the battery while the instrument is powered on may corrupt data stored in the PHD6. If the PHD6 is equipped with a Li-Ion battery, move to an area known to be safe and charge the battery.
If the PHD6 is turned off, press and hold the MODE button for about 5 seconds until. The PHD6 can be equipped with a PID (Photo Ionization Detector) sensor designed to detect volatile organic compounds.
Sampling
Manual sample draw kit
- Manual sample draw kit usage
One for the detection of carbon dioxide (CO2) and one for the detection of methane (CH4). Gas calibration with methane sensor The NDIR-CH4 sensor is specially designed for methane detection. Use of the NDIR CH4 for hydrogen detection can lead to property damage, personal injury, or death.
Connect the short section of tubing coming off the clamp bulb to the sampling adapter. To test the seals in the sampling system, cover the end of the sampling probe with a finger and squeeze the aspirator bulb. If there are no leaks in the sampling kit components, the bulb should remain discharged for a few seconds.
Squeeze the aspirator bulb to draw the sample from the remote location into the sensor compartment. For example, if a 10 foot/3 meter tubing is used, it will be necessary to aspirate the sample by continuously squeezing the bulb for a minimum of 55 seconds or until the readings stabilize.
Motorized sample draw pump
- Starting the motorized sample pump First attach the probe and tubing to the pump,
- Turning off the pump
- Pump low flow alarm
Block the sampling inlet by placing a finger over the end of the sampling probe. Once the blockage is cleared, it will continue to the current gas readings screen and the pump icon will be displayed in the status bar. To turn off the pump, simply remove the pump from the bottom of the instrument.
The sample probe handle contains replaceable filters designed to trap moisture and remove particulate contaminants. The pressure sensor in the sample withdrawal pump is designed to detect pressure changes while the sample withdrawal probe is held in a vertical position. If the probe is held horizontally or at a low angle while inserted into a liquid, sufficient pressure drop may not be created to cause the pump to shut down and water may be drawn into the pump assembly causing damage to the pump, sensors and components. internal of PHD6.
WARNING: Inserting the sampling tube horizontally or at a low angle into a liquid may result in water ingress and may cause damage to the sensors and internal components of the PHD6. If the PHD6 determines that a significant increase in pressure has occurred, it will go into alarm and notify the user that there is a blockage of the pump.
Sample draw probe
Once a blockage is detected, the PHD6 will indicate that the test has passed and instruct you to remove the blockage. If the instrument is unable to detect the vacuum resulting from pump blockage within 30 seconds, the test will fail, the instrument will alarm, and you will be directed to remove the pump. The PHD6 pump contains a pressure sensor that continuously monitors for airflow restrictions caused by water or other liquids entering the unit and immediately acts to shut down the pump to protect the PHD6 sensors, pump and other components from damage.
When the pump is active and functioning properly, the moving pump icon is shown on the bottom status bar of the display. Remove the blockage and press the MODE button to acknowledge the alarm and resume sampling.
Calibration
- Functional (Bump) testing
- Fresh Air/Zero Calibration
- Fresh air calibration failure In the event of a fresh air
- Forced fresh air calibration
- Fresh air calibration in a contaminated atmosphere
- Gas Calibration
- Gas calibration failure: All sensors except oxygen
- Gas calibration failure: Oxygen sensors
- Special Calibration Instruction for NDIR CO 2 sensor
- CO 2 Sensor True Zero
- Special Calibration Instructions for NDIR-CH 4 Sensor
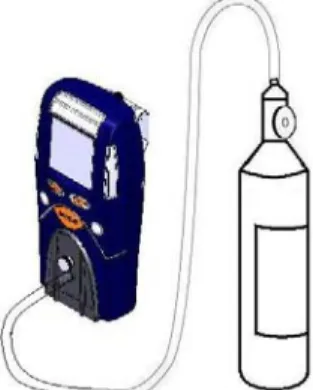
20 Fresh air/zero calibrations should only be performed in an atmosphere known to contain 20.9% oxygen, 0.0% LEL and 0 PPM toxic gas. Press the MODE button three times within two seconds to start the fresh air/zero calibration sequence. Press the MODE button before the end of the 5-second countdown to start the fresh air/zero calibration.
If a successful fresh air calibration is not performed before the instrument is turned off, the PHD6 will note that fresh air calibration is required during instrument startup. If the manual fresh air/zero procedure does not correct the problem, perform the manual fresh air/zero calibration procedure as described in section 4.2.2 below. If the standard fresh air calibration fails a second time, the instrument can be “forced” to accept the fresh air calibration by performing the manual fresh air calibration.
Performing a fresh air calibration in a contaminated atmosphere can lead to inaccurate and potentially dangerous readings. The fresh air/zero calibration is complete when the instrument begins another 5 second countdown to the gas calibration.
Menu Options
Basic Menu
If the oxygen sensor does not detect the drop in oxygen during the gas calibration while challenged with calibration gas containing less than 19.0% oxygen, it should be considered out of tolerance and taken out of service immediately. If the falling oxygen alarm is set to 19.5%, the instrument should alarm after a few seconds. To determine if the CO2 sensor requires zero calibration, connect the PHD6 to a cylinder of calibration gas containing 0.00% CO2 while the instrument is in normal operation.
CO2, leave the calibration gas on and press the MODE button three times within two seconds to start the zero calibration sequence. The PHD6 will automatically prompt the user to apply CO2 calibration gas during the standard gas calibration sequence. In many ways, the NDIR-CH4 sensor used in the PHD6 is similar to a heated bead LEL sensor.
While LEL sensors can be calibrated with a variety of other gases when properly configured, the NDIR-CH4 sensor must be calibrated with methane to the exact amount shown on the calibration gas cylinder. The NDIR CH4 sensor in the PHD6 must be calibrated using methane (CH4) calibration gas at the actual amount shown on the cylinder.
Main Menu
- Using the submenus
- Alarms Menu
- Calibration Menu
- Information Menu
- Datalogger Menu
Cal on Startup is normally disabled on new instruments and must be enabled by the user. Bump Reminder is normally disabled on new instruments and must be enabled by the user. The service interval is normally disabled on new instruments and must be enabled by the user.
The safety beeper is usually disabled on new instruments and must be enabled by the owner. The basic passcode is usually disabled on new instruments and must be enabled by the owner. The master passcode is usually disabled on new instruments and must be enabled by the owner.
Interval (set data logger interval between 1 second and 1 hour) (only menu option not available in Black Box data logger versions) The data logger samples continuously, so the data stream must be divided into intervals to be recorded. User names and locations must be entered into the instrument via BioTrak II before this option can be enabled.
Maintenance
- Batteries
- Replacing alkaline batteries
- Maintaining Li-Ion battery packs
- Storage guidelines for the Li-Ion battery
- Charging guidelines for Li-Ion battery The Li-Ion battery in the PHD6 should never be
- Charging procedure for Li-Ion battery Do not charge the PHD6
- Charging with the pump attached The PHD6 with pump attached may be charged
- Battery troubleshooting
- Sensors
- Sensor replacement
- Care and maintenance of PID sensors The two critical
- Sample probe assembly
- Changing sample probe filters The threaded sample probe handle is accesses
- PHD6 Pump Maintenance
- Replacing pump filters
Loosen the two screws at the top of the battery pack by turning counterclockwise every ¼ turn. European versions of the PHD6 must be charged with the ATEX approved Sperian PHD6 charger. The sensors in the PHD6 are located in a ventilated compartment at the bottom of the instrument.
Remove the four screws located under the battery pack insert from the back of the PHD6. Press gently until the spring releases and the stack can be removed from the top of the sensor. The lamp is spring-loaded against the stack, so holding a finger on top of the stack prevents them from ejecting from the sensor body.
Gently remove the bundle and pull the bulb and spring out of the sensor body. Using a cotton swab dipped in cleaning powder, rub the top of the lamp in a swirling motion.
Appendices
Appendix A Toxic gas measurement – Warning, Danger, STEL and TWA
Warning and Danger Alarms OSHA has assigned some, but not all, toxic
Time Weighted Average (TWA) The maximum average concentration to which an
Short Term Exposure Limits (STEL) Toxic substances may have short term exposure
Appendix B Calibration Frequency
Recommendation
Appendix C PHD6 Sensor Information
Appendix D Electrochemical Toxic Sensor Cross-Sensitivity
Sperian Instrumentation Warranty Gas Detection Products
Instrument & Accessory Warranty Periods
Sensor Warranty Periods