Technical Information
Summary
Specifications
- Specification Sheet
- Capacity Variation Ratio According to Temperature
- Cooling and Heating Data Sheet in Rated Frequency
- Noise Curve
T1: Evaporator inlet and outlet pipe temperature T2: Condenser inlet and outlet pipe temperature P: Pressure on the side of large valve.
Outline Dimension Diagram
- Indoor Unit
- Outdoor Unit
Refrigerant System Diagram
Electrical Part
- Wiring Diagram
- PCB Printed Diagram
These wiring diagrams are subject to change without notice; refer to the one supplied with the unit. Do not touch any electronic component or terminal when the machine is running, stopping or. 1 Communication interface of self-detection service device 2 Communication terminal of indoor and outdoor unit 3 Fuse.
10 Terminal of electronic expansion valve 11 Interface of temperature sensor 12 Overload interface of compressor 13 Terminal of outdoor fan. 1 Interface of compressor wire 2 Overload interface of compressor 3 Interface of temperature sensor 4 Terminal of electronic expansion valve 5 Terminal of outdoor fan.
Function and Control
- Remote Controller Introduction
- GREE+ App Operation Manual
- Ewpe Smart App Operation Manual
- Brief Description of Modes and Functions
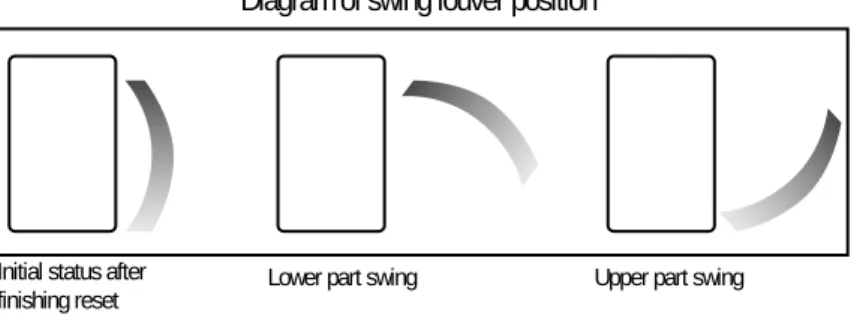
FOLLOW: The device will automatically control the vertical and horizontal swing dampers according to the body sensor to blow air towards people. AVOID: The unit will automatically control the vertical and horizontal swing dampers according to the body sensor unit to avoid direct airflow to people. SURROUND: The unit will automatically control the vertical and horizontal swing dampers according to the body sensor to supply air around the people.
Follows: According to the human sensing device, it automatically controls the swing up and down, swing left and right to supply comfortable air to the position where people stay. In this mode, the unit will operate in the appropriate idle curve according to the different set temperature. Select different left and right swing directions according to the state of the left and right swing remote control.
The APP can choose the continuous nobody saving time to achieve nobody's deep energy saving. when the continuous time of no energy saving is reached, the air conditioner will stop some loads 【such as indoor fan, outdoor unit, etc.】, to achieve the profound goal of energy saving). For the model without the I Sense detection device, the unit will automatically control the up and down movement and the left and right movement according to the setting situation (note: for the model without the I Sense detection device, it does not support the actual detection data of the detection I Sense).
Installation and Maintenance
Notes for Installation and Maintenance
When installing or relocating the unit, keep the refrigerant circuit free of air or substances other than the specified refrigerant. Any presence of air or other foreign matter in the refrigerant circuit will cause system pressure increase or compressor rupture, resulting in injury. 2. When installing or moving this unit, do not fill the refrigerant that does not conform to that on the nameplate or unqualified refrigerant.
If refrigerant recovery takes too long, air can be drawn in and cause pressure build-up or compressor failure, resulting in injury. 4.During refrigerant recovery, make sure liquid valve and gas valve are completely closed and power is disconnected before disconnecting the connecting pipe. If compressor starts running when shut-off valve is open and connecting pipe is not yet connected, air will be drawn in and cause pressure increase or compressor rupture, resulting in injury. 5.When installing the unit, make sure the connecting pipe is firmly connected before the compressor starts running. If compressor starts running when shut-off valve is open and connecting pipe is not yet connected, air will be drawn in and cause pressure increase or compressor rupture, resulting in injury. 6. Prohibit the installation of the unit in the place where there may be leakage of corrosive gas or flammable gas.
To realize the function of the air conditioner, a special refrigerant circulates in the system. All workers involved in the refrigeration plant should be in possession of the valid certification awarded by. If it needs another technician to maintain and repair the appliance, they must be supervised by the person qualified to use the flammable refrigerant.
The air conditioner is not allowed to use in a room that has running fire (such as fire source, working coal gas ware, operating heater). Check whether the maintenance area or the camera area meets the requirements of the nameplate. It may only be used in the rooms that meet the requirements of the nameplate.
Open fire is prohibited in the maintenance area; and the "no smoking" warning sign should be put up. Make sure there are no open flames near the vacuum pump outlet and that it is well ventilated. After filling is completed, do the leak detection before testing; another time of leak detection should be done when it is removed.

Installation
- Installation Dimension Diagram
- Installation Parts-checking
- Selection of Installation Location
- Electric Connection Requirement
- Installation of Indoor Unit
- Installation of Outdoor unit
- Vacuum Pumping and Leak Detection
- Check after Installation and Test Operation
For smooth drainage, slope the pipe hole in the wall slightly downwards towards the outside with a slope of 5-10° (as shown in Fig.2). The position of the pipe hole should be slightly lower than the frame attached to the wall (as shown in Fig. 1). If you get stuck to some extent, separate the indoor supply and then separate the drain hose (as shown in Fig. 13).
Install drain joint (for cooling and heating unit only) (1) Connect the outside drain joint into the hole on the chassis. Connect outside electrical wire (1) Remove the valve cover. 2) Remove the wire clip; connect the power connecting wire and power cord to the wiring terminal according to the color; fasten them with screws.(As shown in Fig.21). The drain hose cannot be curved, raised and variable, etc. (As shown in Fig.24) (3) The water outlet cannot be placed in water to drain smoothly. (As shown in Fig.25) .
Maintenance
- Error Code List
- Troubleshooting for Main Malfunction
- Troubleshooting for Normal Malfunction
Then check that the voltage between terminal 2 and terminal 3 of the motor interface is 15VDC. Is there any abnormal noise or oil leakage; is the case temperature too high, etc. Replace the motherboard with the same model Purge the heat exchangers with high-pressure nitrogen.
The zero cross detection circuit of the main board is defined abnormally. Replace the main board with the same model. Possible Causes Discriminating Method (Air Conditioner Status) Troubleshooting Set temperature is improper Observe the set temperature on remote controller. Adjust the set temperature Rotation speed of the IDU fan. Malfunction of the IDU fan motor The IDU fan motor cannot operate. Refer to troubleshooting for H6 for maintenance method in details.
ODU fan motor failure The ODU fan motor cannot operate. See point 4 of the maintenance method for details.
Exploded View and Parts List
- Indoor Unit
- Outdoor Unit
Hold the horizontal slat with both hands and slowly pull the rod out; with one hand grab the linage post of the left drive box and with the other hand grab the left end of the horizontal slat board part; remove the hook with little force, support the connecting rod with one finger, push the horizontal blind to the left, loosen the cross clamp in the coupling rod from the cross groove in the right end of the horizontal slats - assy to release the horizontal blind from the motor shaft. Lightly push the panel rotation axis to release it from the hole in the panel housing, then remove the panel. Unscrew the screw that secures the I Sense board cover and then remove the cover.
Note: after removing the terminal, assemble the sealing cover (I Sense board) to prevent damage to the cover board from accidental factors;
Removal Procedure
- Removal Procedure of Indoor Unit
- Removal Procedure of Outdoor Unit
Disconnect the conversion board wiring connector in the display board; release the latch on the right side of the display board and remove the display board. Remove the screw securing the left and right drive motors; disconnect the wiring clamp in the motor, then remove the drive motor. Separately, remove the screws that secure the left side cover, right side cover, and mouse prevention board, and then remove them.
Loosen the screws securing the left/right swing motor, and then remove the swing motor. Remove the mounting screws that attach the front panel to the chassis and engine mount, and then remove the front panel. Remove the fixing screws of the electric box; cut the connection line; pull out any wiring terminals; lift up the electrical box housing to remove it.
Unsolder the weld joint connecting the fluid valve and the Y-tube; remove the 2 screws securing the fluid valve to remove the fluid valve. Remove the 6 screws connecting the left and right side panels, then remove the rear grill. Remove the screws that connect the right side panel to the body, the valve support and the electrical box, then
Remove the screws that connect the left side plate and the chassis, and then. Remove the screws securing the electrical box chassis; loosen the wire bundle; pull out the wire clips and then pull the electrical box upwards to remove it. Remove the 4 tapping screws securing the motor; disconnect the front wire insert from the motor and then remove the motor.
Remove the 2 cap screws securing the motor support, then pull the motor support upwards or emovei .t. Drain the coolant completely; desolder the piping connecting the compressor and condenser, then remove the 4-way. Remove the screws connecting the support (capacitor) and the capacitor, then remove the support (capacitor).
Configuration of Connection Pipe
Remove the union nut on the inner connecting pipe and the outer valve; install the union nut on the pipe.
Pipe Expanding Method
List of Resistance for Temperature Sensor
